Showing posts with label how. Show all posts
Showing posts with label how. Show all posts
Saturday, September 10, 2016

Friday, September 9, 2016
How to Install CM11 Nightly LG G3
How to Install CM11 Nightly LG G3
How to Install CM11 Nightly LG G3 - European users of the LG G3 began receiving the update to Android 5.0 Lollipop recently, but for those of us in other parts still have to wait. Unless we decide to try some of the excellent custom ROMs that this device has available, including of course one of the most interesting it is to CyanogenMod. Let us see how to install CyanogenMod 11 Nightly LG G3.
This is a ROM based on Android 4.4.4 KitKat AOSP, meaning that for now does not give us the same as Lollipop but has some of its features, and developers are already working on CM12, based on Android 5.0 .

Before you begin, as always we emphasize when performing these procedures, that it will be advisable to make a backup of all our critical data, or if we prefer a Nandroid back to our computer to the current situation if something we do not like. Also, before something like this it is necessary to charge the battery up to 60% or more, and finally we will need USB debugging enabled (that we do in development options).
Now if we can start:
- CM11 Nightly downloaded from this link and do the same with the gapps package from this other link.
- We connect the LG G3 to our PC via USB cable and copy both files to the internal storage.
- Disconnect the phone cable and turn it off.
- We waited a few seconds and turn it on in recovery mode.
- We wipe data, cache and Dalvik.
- We return to the initial screen of the recovery and select install zip from sdcard "and then" choose zip from sdcard. We choose the ROM file and confirm using the Power button.
- We wait a few seconds and repeat the process for archiving the gapps.
- We return to the initial screen of the recovery and select reboot now.
Like every time you install a new ROM, the first reboot must arm ourselves with patience because it takes something more than usual, but at the end we will have installed CM 11 Nightly our LG G3.
Available link for download
Thursday, September 8, 2016
Here is how the smartphones of future will feel and look like
Here is how the smartphones of future will feel and look like
Here is how the smartphones of future will feel and look like

Future smartphones will be foldable, have a virtual avatar or be like robots in your hands? Take your guess!
Smartphones have revolutionized the way we live. No more queuing for getting a ticket booked, no more fear of getting lost in an unknown town, no more hustles for enjoying the internet and….( can write 100 things). The list is very long. We all are smartphone fans and are always excited about what to come in this sector. Companies know this and hence are involved in extensive research for making their smartphones heavy in features and light in expense.
It is tough to exactly predict what smartphones will look like and be like in the forthcoming time, but we can make our assumptions after analyzing the current state of the smartphone sector. We have concluded it to a list of capabilities which smartphones will feature. Some of them have already been introduced but are in their “beta” state. Some have gone far but still not upto the mark.
The list follows:
Augmented Reality
AR, acronym for Augmented Reality is the most common term you’ll hear from the people involved in R&D of smartphones.
Augmented reality (AR) is a live direct or indirect view of a physical, real-world environment whose elements are augmented (or supplemented) by computer-generated sensory input such as sound, video, graphics or GPS data.
The following paragraph is for those who are new to this term, if you have seen the demonstration of AR, you may like to skip the next paragraph.
Suppose you are playing a game, a battle game lets say, you are the fighter and your home is the battlefield. Everything is so real that you feel that your home has turned into a battlefield. Sounds exciting, and is more exciting to feel.
Smartphones can be a great platform for AR to work. You’ll just have to open the camera and the phone will tell you about the restaurants nearby( or any other thing which you’re searching for), which otherwise would be a difficult task to open certain apps and then search, wait and then get incomplete results. The biggest hurdle faced in the development of AR is the limited recognition capacity. The capacity of our smartphones to recognize whats in their camera view. As this problem is circumvented , AR will be on the next step.
Flexible Screens:
Well, that is the start, in future you will be able to carry a smartphone with screen size as large as a big TV and the smartphone will fold and fit into your pocket.
The new OLED(Organic Light Emitting Diode) technology will allow screens of future to be foldable
and dual sided. And this magical screen will be as thin as a sheet of paper!
In Built Projector
Thats an old thing! Yes! we know, but the range and luminosity will be far much better in next gen smartphones that those phones will be able to serve as an alternate of projectors. You’ll just need a flat surface to enjoy high quality visuals.
Smartphones with in Built projector had been introduced in the previous decade. But they were not suitable for real life entertainment. Battery backup issue also created a trade-off. It is being hoped that these problems will be solved in the near future.
Seamless Voice Control:
Voice control has been receiving much attention since Siri made headlines. Voice control has existed in many earlier mobile phones even though the voice recognition function was crude at best. Research has been made to advance the development of voice control, but it has proved to be a paramount task.
The way Siri interprets the voice input has signaled a breakthrough in the ways of voice interpretation through artificial intelligence. Instead of just depending on the sound waves for recognition of commands, Siri also makes note of the diction and syntax. Such interfaces are more accurate and easy to use.
This, combined with gesture recognition may result in smartphones that will understand non verbal inputs and talk to us in the way other humans do.
Holograms and 3D Display
With Apple’s Retina Display, we’re already very much progressed in terms of screen quality. Next is the time for 3D. There are couple of smartphones already present in the market which have a 3D screen. We can expect this feature to be a common one among phones in future.
On further advancement, smartphones will be powered with holographic display. This means that you will be able to interact with your screen objects directly and in a fun way.
In case you have any wild guess about the future of smartphones, post it in the comments.
readmore @ techworm
Available link for download
HOW TO GET 5GB WITH 2000 ON MTN SIM
HOW TO GET 5GB WITH 2000 ON MTN SIM
How To Get MTN 1.3GB, 3.75GB, 5GB Data Plans For As Low ?1,000
 Just in time, MTN Nigeria introduced new cheap internet data plans that work on every internet enabled devices
 With just N1,000 you can get 1.3GB of data, and N2,000 for the 3.75GB or 5GB of data.
To Subscribe For this plan:
1.3GB @ N1,000 ~ Text 106 to 131 30 Days
3.75GB @ N2,000 ~ Text 110 to 131 30 Days
5GB + N2560 free airtime @ N2,000 ~ Text D2000 to 131 30 Days
Note: for the MTN 5GB data, you must have migrated to MTN Truetalk by dialing *400# before you can use this plan.
Hope you find this plans useful. With this newly introduced MTN plans, you no longer need to worry about Airtel plans that steals data. Just subscribe and you are good to go.
Happy Surfing!
Available link for download
How To Use Dual Whatsapp Account On Android phone 2016
How To Use Dual Whatsapp Account On Android phone 2016
Dear Friends Method 1:- Dual Whatsapp By Using WhatsMapp 2016
Dear friends WhatsMapp solo is an Amazing App. Friends Now using this App we can Easily create another Whatsapp account on the single Android device. Friends its provide custom icons, F Status bar color changing in Lollipop version. Friends Its one of the important feature is it is a antiban App.
Dual Whatsapp account By Using WhatsMapp 2016
Dear Friends How To Create Account On WhatsMapp 2016
1. Friends First Friends you have to download this App and install into your Android phone. Now you can download it from the button shown below.
Download Here Now Click Here
2. Friends Follow the same steps as you follow to make a whatsapp account. Now Dont use the same number to create an account.
3.Friends If you face some problem then you should backup and remove the original whatsapp and after that install this App.
Now Method 2:- Friends Dual Whatsapp By Using OG WhatsApp
Dear Friends Dual Whatsapp By Using OG WhatsApp 2016
Now Show Steps To Create Account On OGWhatsapp
1. Dear Friends First you have to F backup your chats from the Whatsapp settings. Now You have to go to WhatsApp settings >> chat settings >> Back Up chats.
Dual whatsapp ogwhatsapp chat settings.
2. Friends After that you have go to your phone settings >> Apps >> whatsapp and Now click on it and tap the clear data option.
Android app info clear data for dual whatsapp.
3. Friends Now go to your whatsapp folder whether it is located on phone storage and SD card and rename it to OGwhatsApp.
4. Dear Uninstall your original whatsapp.
5. Friends Now you have to download this App and install into your Android phone. Friends you can download it from the button shown below.
Download Here Now Click Here
6. Now Create your Account and enjoy the trick.
7. Now Download original whatsapp create/ restore your old account. Now you have dual Account.
Dear Friends Note:- Now In some devices second method may and may not works then i recommend to try first method.Thanks
Dear Friends So these are the best possible ways to use dual or two whatsapp account on single android device at same time.And In case you find this trick not working or have any trouble dont forget to share Your Facebook,And Other Site.your precious comment.Thanks
Available link for download
Wednesday, September 7, 2016
How to install the newest Android 5 1 1 for Sony XPERIA Z C6603 firmware 10 7 A 0 228
How to install the newest Android 5 1 1 for Sony XPERIA Z C6603 firmware 10 7 A 0 228

a) first of all, check your firmware version (if you already have the newest one, you do not need this tutorial)
b) download and install latest Flashtool from this Post
c) download also latest Android 5.1.1 (mirror Google Drive) for Sony XPERIA Z
d) paste the ftf file downloaded in step c) to folder „Firmware“ included in the XPERIA Flashtool
e) open the XPERIA Flashtool, click on flash and choose downloaded firmware, than click ok. Important - if you do not want to delete any data of your phone, just uncheck flashing userdata.sin file. All data will remain in your phone, but sometimes it can cause additional troubles. So it is better (and I recommend that) to do the backup of your personal data, than proceed with clean instalation and then restore your personal data.

f) turn off your phone and when Flashtool shows pop up window, connect phone to PC with holding volume down button
g) after few minutes all is done and your phone gets the new firmware
Available link for download
HOW TO ROOT TECNO J8 BOOM
HOW TO ROOT TECNO J8 BOOM

TUTORIAL ON HOW TO ROOT
TECNO J8 BOOM
TECNO J8 BOOM
- Download Kingroot
- Install the app on the phone
- Ensure you have an internet connection on the phone then launch the app
- Wait for all checks to be complete
- Click the center button (with Root and some Chinese texts inscribed on it) to begin rooting
- Wait for rooting to complete
- You should see a green tick to confirm that rooting was successful
Available link for download
How to install TWRP recovery of Moto E
How to install TWRP recovery of Moto E
How to install TWRP recovery of Moto E - I recently saw how to access the recovery in Moto E, and the truth is that although it is an important tool to perform several advanced tasks on our device, is not the same make that comes preinstalled with a more advanced use. Therefore we want to show how to install the recovery of TWRP Moto E, in order to take advantage of its best features when it comes to get their hands on our phone.

Is that TWRP is a recovery that with the passage of time is becoming standard, in part because of its functionality touch that actually became so popular that even led to the emergence versions of CWM recovery (formerly the most popular) with support for touch screens.
Here we will modify essential part of running our phone, so it is always advisable to make a Nandroid or a backup of critical data (videos, images, music) in order to have them available in case something goes wrong. We will also need the Android SDK, enable USB debugging (between development options) and last but very important to have a battery charging at least 60 percent.
Now if we can start:
- Download the file recovery of TWRP.
- We turn off the Moto E, waited a few seconds and turn on in fastboot mode (by pressing the keys on Volume- and on and holding them for about 6 or 7 seconds).
- We connect the phone to our PC via the USB cable.
- We go to the folder where you have the Android SDK and open a terminal window (command prompt in Windows).
- We write (without the quotes, of course) "fastboot flash recovery.img".
- On the phone, which is in fastboot mode, we pressed to move and select Volume-recovery (by pressing Power).
- Moto E enters recovery mode, although for the first minute or two still will not have the functionality available touch, so be patient.
- Select the option reboot system now and thats it; next time we enter the recovery we will at TWRP.
Available link for download
How To Add All Friends To Facebook Group By One Click 2016
How To Add All Friends To Facebook Group By One Click 2016

- F Steps
- F Steps To Add All Friends in Facebook Groups
- F First of all Log in into that f whose friends you want to invite F.
- F Then open your Facebook Group in which you want to add friends.
- F Now Click F12 button to open debugger and then select console box.
- F Now copy script from below given button.
Get Script Click Here

F Steps:2
- F 1: Now Open google chrome
- F 2:Now Ads This Add-ons
F Press enter and process will start for sending invitation.
- Note:- F Dont worry about anything this script is totally safe. In F case you have too many friends then you get F blocked for using groups or even your account may get locked. So be careful.F
Available link for download
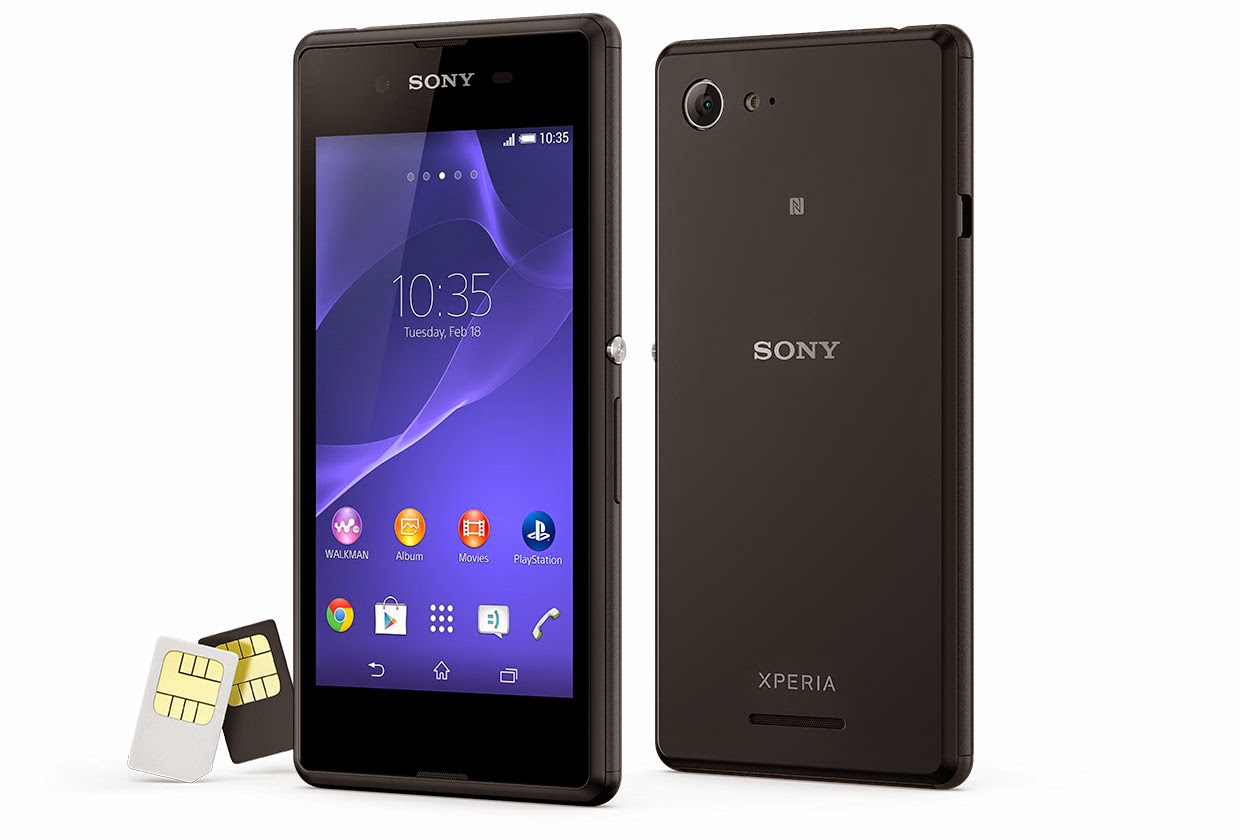
How To Unlock Bootloader Sony Xperia E3 Dual D2212 And Install the newest android 4 4 2
How To Unlock Bootloader Sony Xperia E3 Dual D2212 And Install the newest android 4 4 2
how to unlock your bootloader
a) download and install latest Flashtool from here (mirrors Google Drive, Ulozto or Mega)
b) start Flashtool and click on BLU button on the top
c) turn off your phone and when Flashtool shows pop up window, connect phone to PC with holding volume down button
d) click on get unlock key button, it will switch you to Sony Mobile website, here complete all boxes
e) copy IMEI form Flashtool to Sony Mobile site, than you will get unlock code to your mailbox
f) copy unlock key to Flashtool window and than click unlockg) connect phone with holding volume up button when Flashtool shows pop up window
h) wait to unlock finish.
how to install the newest Android 4.4.2 for Sony XPERIA E3 Dual D2212
a) first of all, check your firmware version (if you already have the newest one, you do not need this tutorial)
b) download and install latest Flashtool from here (mirrors Google Drive, Ulozto or Mega)
c) download also latest Android 4.4.2 (mirrors Google Drive or Mega) for Sony XPERIA E3 Dual
d) paste the ftf file downloaded in step c) to folder „Firmware“ included in the XPERIA Flashtool
e) open the XPERIA Flashtool, click on flash and choose downloaded firmware, than click ok. Important - if you do not want to delete any data of your phone, just uncheck flashing userdata.sin file. All data will remain in your phone, but sometimes it can cause additional troubles. So it is better (and I recommend that) to do the backup of your personal data, than proceed with clean instalation and then restore your personal data.
f) turn off your phone and when Flashtool shows pop up window, connect phone to PC with holding volume down button
g) after few minutes all is done and your phone gets the new firmware.
how to relock your bootloader
a) download and install latest Flashtool from here (mirrors Google Drive, Ulozto or Mega)
b) start Flashtool and click on BLU button on the top
b) start Flashtool and click on BLU button on the top
c) turn off your phone and when Flashtool shows pop up window, connect phone to PC with holding volume down button
d) just click on relock button and your bootloader is locked for now.FOR MORE INFORMATION VISIT:-
http://xperiafirmware.com/8-firmware/72-sony-xperia-e3-dual-d2212
if you have any query....ask me in comment column
http://xperiafirmware.com/8-firmware/72-sony-xperia-e3-dual-d2212
if you have any query....ask me in comment column
Available link for download
Tuesday, September 6, 2016
What is ROM and How to Choose Perfect ROM For My Android Device
What is ROM and How to Choose Perfect ROM For My Android Device
You’ve been with your no-longer-so-brand-new Android phone for a long time now. It has become slow, there are apps that are no longer compatible with your operating system version and widgets and do not convey any emotion.
If your phone was a PC, you would have formatted and installed latest operating system. Same thing goes with Android, where you have to install ROM on device.
What is an Android ROM? What about firmware?
Firmware and ROM are one and the same thing: Read-only memory on your phone, can be said to be Soul of your Phone. Contains the Google Android operating system, duly adapted and configured to work with the hardware-specific mobile phone (antenna, computer graphics, cameras, etc.).
The operating system is in a read-only memory for two reasons: to prevent overwriting files, and to keep you faithful to small changes and integrated applications that manufacturers often include in their models. Being open source, Android allows for all sorts of modifications. In addition to the official ROM, very common thing you find is ROM made ??by groups of volunteers and enthusiasts who take the code base and add or remove features or skins. Even you yourself can create (cook) yours.
So why should I change the ROM?
For the same reason you changed your phone, whatever. Some people need more performance, who want to upgrade the operating system to a later version without waiting for official update, and who wants to renew the look of your phone or just try new things.
Is it Dangerous? Can Anything go Wrong?
No. Generally nothing happens as long as we follow the steps given correctly. Chances are new ROM may wipe out user data so, take backup (Titanium Backup is recommended). Or it may happen that some of your apps aren’t compatible with new ROM so, there are always alternatives to choose from million in Android Market.
Bricking of Phone (Phone actually becomes no more than a brick) is an extreme case which results out of carelessness and improper following of instructions.
How to flash a ROM?

Step 1. Install ROM Manager
Your Phone needs to be rooted, the next step is to install ROM Manager, a great app that lets you download and flash new ROM and change the recovery (recovery mode of mobile) with ClockworkMod, from which it is possible to perform full backups and delete the phone memory, among many other things.
Step 2. Install the recovery ClockworkMod
To install ClockWorkMod Recovery, Press the menu option in the ROM Manager. After downloading the image with the latest version of recovery, the app will ask you to restart the phone in recovery mode. From Recovery Mode, you can get back to normal mode with Reboot option.
Step 3. Flash ROM
ROM Manager has another important feature of installing ROM from SD Card. You generally have to download Custom ROM provided by developer and insert that ZIP file into root directory of SD card and then flash it.
How to Choose Perfect Android ROM
There is nothing like Perfect ROM but still, choosing a ROM for your Android phone is not a simple matter. Before flashing a note the following:
- Compatibility with your device (model, manufacturer and country)
- Presence of your favorite apps (HTC Sense, Google apps, etc.).
- If you need external partition (A2SD) or installed into the memory
- User Comments and Review about them
 .
.
Some popular ROMs available are:
- CyanogenMod, the best known and with support for most brands
- MIUI, a spectacular ROM for Samsung, LG, Motorla and HTC
- LeeDroid , HTC mobile for fans of HTC Sense
There are many more, some more stable than others. All bring something, but the choice is up to you. You can always browse XDA Forums to find the one for yourself.
Available link for download
How to stop cell broadcast ETWS messages and notifications in android mobiles
How to stop cell broadcast ETWS messages and notifications in android mobiles
Hi guys..recently I have faced a problem in my friend mobile lenova a7000. In which the network provider gives lot of ETWS cell broadcast messages. It annoys lot.
First ETWS stands for is Earthquake Tsunamis Warning Messges which provided by Network provider.
You can disable these notification via following steps
1. Open Message app in your mobile
2. Open Message settings
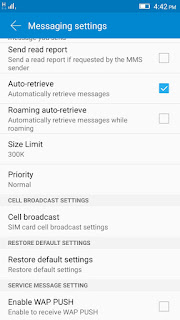
3. Just locate the cell broadcast option in the message settings.
4. Click on cell broadcast which is shows which provider gives the ETWS messages. Just click on that.
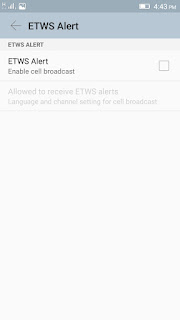 5. Now just untick the ETWS alerts.
Thats it..
Now you would not receive any type of broadcast messages.
Note: The steps may be varied in other mobile. But its almost locate in message settings only.
First ETWS stands for is Earthquake Tsunamis Warning Messges which provided by Network provider.
You can disable these notification via following steps
1. Open Message app in your mobile
2. Open Message settings
3. Just locate the cell broadcast option in the message settings.
4. Click on cell broadcast which is shows which provider gives the ETWS messages. Just click on that.
Thats it..
Now you would not receive any type of broadcast messages.
Note: The steps may be varied in other mobile. But its almost locate in message settings only.
Available link for download
How to Root Sony Xperia Z1 C6902 C6903 C6906 C6943 4 2 2 Jelly Bean Build 14 1 G 1 534
How to Root Sony Xperia Z1 C6902 C6903 C6906 C6943 4 2 2 Jelly Bean Build 14 1 G 1 534
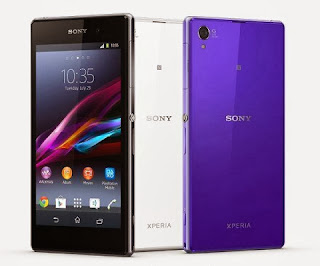
Root Your Sony Xperia Z1 Running Jelly Bean 4.2.2 Build number 14.1.G.1.534. This works on Locked Bootloader as well as Unlocked Bootloader. All the images used in the tutorial are not mine , I have used images by krabappel2548 , special thanks to him and the Chinese who have made the software vRoot , which we will using to root the phone.
This tutorial is for Xperia Z1 running Jelly Bean 4.2 Build number 14.1.G.1.534.
Disclaimer : I am not responsible if you brick your phone or if u make any other damage to your phone, you have been warned.
So Lets Start :
1. First make sure you are running Jelly Bean 4.2.2 Build 14.1.G.1.534. Go to Settings > About to verify this.
2. Enable USB Debugging , Go to Settings > About phone and tap 7 times on Build number to enable Developer options, now Go to Settings > Developer options to enable Enable USB debugging mode.
3. Enable Unknown Sources. Go to Settings > Security and check Unknown sources.
4. Download vRoot from here - http://www.mgyun.com/vroot
Yeah it is in Chinese, so bear with it :P , download it and install this software just click next next like u install any other software :P
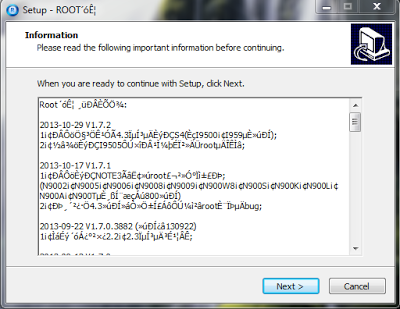
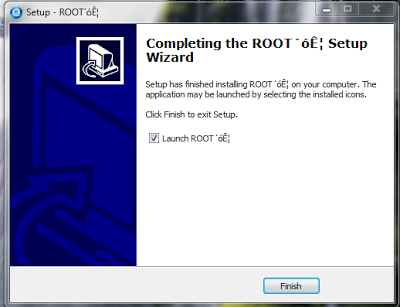
5. Open the vRoot (ROOT´óʦ , this will be the name of the program) and Connect your data cable to your phone and PC , you will see a green Root icon in vRoot, click on that to start the rooting process. See the below screenshot.
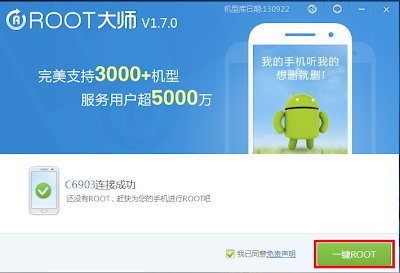
6. When it is finished your phone will restart automatically and vRoot will show something like the below screenshot.
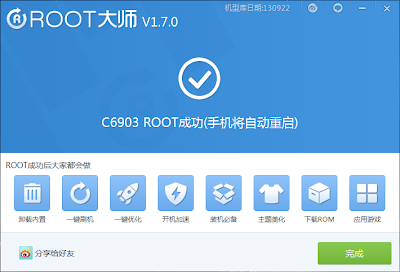
7. Congratulations your phone is now rooted . To verify see the Kinguser app , see the note below to replace it with SuperSU.
Note :- If you want to change the Kinguser (Chinese Superuser app) to SuperSU , Download this File - LINK. Extract it somewhere , and run runme_win.bat. Kinguser will change to SuperSU.
OR
If you want to change the Kinguser (Chinese Superuser app) to SuperSU , just download SuperSU from Playstore , open it , it will ask for Root Permissions , grant it , then follow the screen instructions to update the binary. Now open SuperSU , go to Settings and click on "Install SuperSU into /system" . Your phone will reboot and Kinguser will automatically get uninstalled :)
Note : This method works on both locked and unlocked bootloader devices!!!
If you have any problems feel free to comment.
Source - XDA
Available link for download
Sunday, September 4, 2016
HOW TO GET 500MB FOR JUST 25 ON MTN SIM
HOW TO GET 500MB FOR JUST 25 ON MTN SIM
If you like to download with your mtn siim @ night
Mtn as roll out free night sub,
How Can I Get MTN 500MB for #25?
It is pretty simple, just do the below;
Migrate to MTN iPulse if you are not already there by dialing *406#


“Dear customer, you have successfully subscribed to Free Night Browsing between 00:00 and 04:00. N25 has been deducted from your account"
Note: this plan is usable only within 12am – 4am.
you can’t accumulate and Subscribe for it again when U exhaust the first 500MB untill nextday
If you have more than 1 MTN sim, with just N100, you have 2GB staring at you dailing
You can also get 1gb with just #500 with this plan
by dialing *406# to get yours
Mtn as roll out free night sub,
How Can I Get MTN 500MB for #25?
It is pretty simple, just do the below;
Migrate to MTN iPulse if you are not already there by dialing *406#
Make sure you have minimum of N30 in your phone
Send NIGHT to 131 via SMS
Send NIGHT to 131 via SMS
You’ll get a message like this
Note: this plan is usable only within 12am – 4am.
you can’t accumulate and Subscribe for it again when U exhaust the first 500MB untill nextday
If you have more than 1 MTN sim, with just N100, you have 2GB staring at you dailing
You can also get 1gb with just #500 with this plan
by dialing *406# to get yours
Available link for download
How to make your battery properly wipe
How to make your battery properly wipe
How to make your battery properly wipe - One of the most common problems we encounter those who are constantly making changes or Firmware Roms our Android devices is that the battery life is quite suffers, and eventually last us much less than it should take us.
In Roms based on ICS or MIUI, it is a proven fact, as they consume rather more battery than normal by comparison with the original for our devices Roms Stock, also depends heavily on the use ourselves we give our terminals, but as overall we should last longer than it actually last.

This is because the battery makes us literally crazy and not really know which load percentage is in reality, it may be that as we change the firmware or Roms, if we are not doing correctly Wipe Battery Stats, the battery of our live device deceived and think that is already fully charged when not even be 50% of its capacity.
With so then I will explain, we will have to learn two simple methods of how to make a Wipe Battery Stats in the right way.
One is simply an application available on the Play Store following its simple instructions, the other system and I personally recommend, it will do so from the modified-Recovery ClockworkMod our rooted terminal.
Wipe Battery Stats do using the Battery Calibration application
- Primea what we should do is to unburden the app from the Play Store or by clicking here.
- Once you have installed on our device, we execute it and we will give you root permissions.
- Once opened connect the mobile charger, preferably at the mains charger no USB to computer.
- When the application at hand and visually sound advise us that our battery is charged to 100%, we still leave it charging about 20 minutes to 30 minutes more.
- Now we will press the button that says Battery Calibration will confirm if we should ask as the message that the battery is now calibrated, we can disconnect the charger from the device we report.
- Now we can use the device normally, and we let the battery completely runs out, until the terminal is turned off.
- In this step the device off, as it has completely exhausted the battery, connect the charger again and leave it loaded without disturbing or interrupting until he tells us that it is 100% charged.
- What will light and use it regularly, but leaving again to exhaust the battery before turning off, and the same way we did before will connect to its charger and leave it unmolested until it reaches 100% again.
With this we have done correctly Wipe Battery Stats using the aforementioned application, now I will tell you the same method but without using any third-party application, we will from our Android Recovery.
(Recommended method): How to make Wipe Battery Stats in our battery from ClockworkMod Recovery
- Connect the device to your electrical charger and wait until the battery is 100%. Once tell us it is 100%, we wait a half hour before disconnecting or proceed to the next step. The load can do indifferently to the terminal on or off.
- Once this 100% charged and having left that half hour more, without unplugging the charger, will quench the terminal and will light in Recovery mode.
- Within the Recovery descend to the Advanced option and within select Wipe Battery Stats and confirm.
- Back to the main screen of Recovery, all without disconnecting charger, and select Reboot System Now.
- Wait for the device to start fully and once operative it is when will disconnect the electric charger.
- As with the application we make two charging cycles, this means that we will leave you completely use up the battery until the charge device and pull it off and unmolested until this 100%, once it is full will load as before and leave it to fully discharge to repeat the full load without disturbing the device.
With this we have the battery of your Android properly calibrated and youve returned to the reality of their loading and unloading, now it just depends on how you use it so that it lasts more or less.
Available link for download
Saturday, September 3, 2016
How To Install Apps Onto Your SD Card No Root
How To Install Apps Onto Your SD Card No Root

Have you ever ran low on memory space on your android and had to delete some apps? With a computer and a micro SD card you dont have to worry about running out of space on your phone any more! You dont even need to root your phone! After this, your phone will automatically install apps to your external memory.
Note - this works on both Windows and Mac OS
Items needed
1. Android Phone
2. Micro usb cable
3. Computer
Step 1: Getting Ready to Change Installation Location
1. Get the Google Android SDK
- Unzip the file and place the folder onto your desktop or anywhere that can be easily accessed.
- find the platform tools folder (default, it should be : adt-bundle/sdk)
2. Find cmd/terminal (for mac)
- (for mac users) go to [System Preferences > Keyboard > Keyboard Shortcuts > Services]
and then check the box [New Terminal At Folder]
3. Go onto your Android phone and select USB debugging
- Go to [System settings > Developer Options] and select USB Debugging (if the option is grayed out, unplug your phone first)
Step 2: Using adb
1. Windows
- Open the folder called " platform-tools"
- shift+right-click anywhere inside the folder and choose [Open Command Window Here]
Mac
- right-click the folder called "platform-tools" and choose [New Terminal At Folder]
2. Enter in the following
For Windows :
adb devices ---> to view attached device
adb shell ---> to write shell script
$ adb set-install-location 2 ---> to set SD as install location (Set to 0 for Phone)
$ exit
---------------------------------
adb shell pm setInstallLocation 2 ---> to allow all app to move on SD Card (If above fails)
For Mac : (Note - there is a period before the slashes)
./adb devices
./adb shell pm set-install-location 2
./adb shell pm get-install-location
3. Check if you did it right
- if you did it right, the last output should say: 2 [external]
If you did it right, CONGRATS! Your phone will now install your apps to your SD Card by default! Have fun now!
Step 3: More Info

CAUTION
Some apps will not continue to function properly if located on your SD Card.
Moving Apps
[System Settings > Applications > Manage Applications] and select the app your want to move and press move.
Note:
More info image differs in different android versions.
For any queries, Please leave comments bellow.
HELP MAKES ALL HAPPY
Available link for download
How to Root Sony Xperia L C2104 C2105 Jelly Bean 4 2 2 Build 15 3 A 0 26
How to Root Sony Xperia L C2104 C2105 Jelly Bean 4 2 2 Build 15 3 A 0 26

Today Xperia L got the Jelly Bean 4.2.2 Update unexpectedly , and here is how to root Xperia L running the new Jelly Bean 4.2.2 Build Number 15.3.A.0.26. This works for both locked bootloader as well as unlocked bootloader devices.
This tutorial is for Xperia L Running Jelly Bean 4.2.2 with Build Number 15.3.A.0.26 .
Disclaimer : I am not responsible if you brick your phone or if u make any other damage to your phone
So Lets Start :
1. First make sure you are running Jelly Bean 4.2.2 Build 15.3.A.0.26. Go to Settings > About to verify this.

2. Enable USB Debugging , Go to Settings > About phone and tap 7 times on Build number to enable Developer options, now Go to Settings > Developer options to enable Enable USB debugging mode.
3. Enable Unknown Sources. Go to Settings > Security and check Unknown sources.
4. Download vRoot from here - http://www.mgyun.com/vroot
Yeah it is in Chinese, so bear with it :P , download it and install this software just click next next like u install any other software :P


5. Open the vRoot and Connect your phone Xperia L to your PC , you will see a green Root icon in vRoot, click on that to start the rooting process. See the below screenshot.

6. When it is finished your phone will restart automatically and vRoot will show something like the below screenshot.

7. Congratulations your phone is now rooted :P. To verify see the Kinguser app , see the note below to replace it with SuperSU.

Note :- If you want to change the Kinguser (Chinese Superuser app) to SuperSU , Download this File - LINK. Extract it somewhere , and run runme_win.bat. Kinguser will change to SuperSU.
OR
If you want to change the Kinguser (Chinese Superuser app) to SuperSU , just download SuperSU from Playstore , open it , it will ask for Root Permissions , grant it , then follow the screen instructions to update the binary. Now open SuperSU , go to Settings and click on "Install SuperSU into /system" . Your phone will reboot and Kinguser will automatically get uninstalled :)

Note : This method works on both locked and unlocked bootloader devices!!!
If you have any problems feel free to comment.
Available link for download
How To Make Money Social Media Network 2016
How To Make Money Social Media Network 2016
Friends How To Earn Money From Tsu ?
Dear Tsu works same as Facebook, F But the only think is you earn money for doing f all the same activities. You just have to refer others to join F Tsu and follow you and add you as a friend. In short you have to increase followers and friends Now,and when you post something then you will earn money if someone likes, share and comment on your status and images.F
F After creating new account complete your account details like profile picture, cover and F other basic information.
F Then click Edit profile and all option will available in left sidebar and F you can checkout your earning from bank option.
NOW If you want to refer other friends to join you simply go to Settings >> F Then invitation option from right sidebar.
Dear Copy your refer URL and share it any where you want to get more follower and friends.
F More friends and follower will increase your reach and will help earn revenue.
Dear How Much User will earn ?
F Tsu is 90% revenue sharing network means all earning generate from your activities 10% will tsu take for its maintenance and F other costs to run company. F In other words you are not even earn a single penny from Facebook, F twitter for daily activities according to data we help Facebook to earn $1-$2 on avg of daily usages.F But we didnt get anything. Tsu will provide all the earning they earn from there advertisers on bases of every user activities.F
F Suppose we have around 100 Friends and follower on tsu then we will earn around $2-$5 depend on F activities. So as your friends and follower will increase your earning will definitely increase. So total likes, F share and comments done by you on other friends also help to get exposure and help in increasing earnings.F
F Tsu earns from there Ads, F Reviews from which they distributed 90% share in users. 50% will be distributed in user with the help of this F amount is generated and rest of 40% is disturbed in family tree by the concept of 1/3 in infinite loop. F
F Suppose User A invite User B and further User B invite User C and so on. F If user c having follower and friend they will earn from it. 1/3 of F user c earning go to user B and 1/3 goes to user a amount earn by user B from referring earning.F No doubt user B will not make any effort to earn more.F
F In short understand what is appearing in current earning balance is real amount F you will get. F No F amount will be deducted from it. F All the refer distribution and review F sharing is done in back end and Final earning will appear in your account. F Just understand if you able to make HZ 200 friends and followers your earning will vary from $5-$10. If you have more friends and follower you earning will increases.
Sing Up
Available link for download
Thursday, September 1, 2016
How To Remove FRP Lock From Huawei Honor 5X KIW L21 1000Test
How To Remove FRP Lock From Huawei Honor 5X KIW L21 1000Test
Any Problam Call Me:+8801966128447
md.iqbalkhan708@yhaoo.com
Available link for download
How to Root Sony Xperia SP C5302 C5303 Jelly Bean 4 1 2 Build 12 0 A 2 254
How to Root Sony Xperia SP C5302 C5303 Jelly Bean 4 1 2 Build 12 0 A 2 254

Root your Sony Xperia SP (C5302 / C5303) on the latest Jelly Bean 4.1.2 Firmware 12.0.A.2.254. This is for only for 12.0.A.2.254 firmware , do not try this method on any other firmware or variant.
If you want to root an older firmware READ THIS , or if you want to root 12.0.2.245 , READ THIS
Disclaimer : I am not responsible if you brick your phone or if u make any other damage to your phone
So Lets Start :
1. First of all download these three files :
- XperiaSP_C530X_12.0.A.1.257_KernelOnly.ftf
- DooMLoRD_Easy-Rooting-Toolkit_v18_perf-event-exploit.zip
- XperiaSP_C530X_12.0.A.2.254_KernelOnly.ftf
2. Run Flashtool and Flash XperiaSP_C530X_12.0.A.1.257_KernelOnly.ftf file. (Follow the onscreen instructions of Flashtool) If you have not used Flashtool before Refer this - LINK.
3. Now when the flashing is finished , reboot your Device and Connect Your Device to PC with USB Debugging Mode On , go to Settings > Developer Options to enable it.
4. CLOSE FLASHTOOL ( Do Not Skip This Step )
5. Extract the file DooMLoRD_Easy-Rooting-Toolkit_v18_perf-event-exploit.zip to root directory on C:
6. Now go to the Folder where you extracted DooMLoRD_Easy-Rooting-Toolkit_v18_perf-event-exploit.zip, and execute "runme_win.bat" (Windows Users).
Note :- This toolkit works on Windows , Linux as well as MAC , Linux users Run "runme_linux.sh" and MAC users Run "runme_mac.sh".
7. After rooting is completed the device will restart automatically.
8. Verify the Root By checking the SuperSU app in the AppDrawer.
9. Now Power Off your phone and connect in Flashmode with Volume Down (-) and open Flashtool again.
10. Now Flash XperiaSP_C530X_12.0.A.2.254_KernelOnly.ftf file.
11. Thats all now , after the Flashing is finished disconnect your phone and Power ON your phone and enjoy the Root on the latest firmware :)
Note : This method works on both locked and unlocked bootloader devices!!!
If you have any problems feel free to comment :)
Source - XDA
Available link for download
Subscribe to:
Posts (Atom)