Thursday, September 1, 2016
How to Install Android Lollipop 5 0 2 Build 19 3 A 0 470 on Sony Xperia T2 Ultra D5322 D5303 D5306 D5316 XM50h XM50t
How to Install Android Lollipop 5 0 2 Build 19 3 A 0 470 on Sony Xperia T2 Ultra D5322 D5303 D5306 D5316 XM50h XM50t
Sony has finally released the official update of Android 5.0.2 ( Build 19.3.A.0.470 ) on Sony Xperia T2 Ultra , but it is yet to roll out in all the countries and all the models. So if you are yet to receive the update and cannot wait , here is the method to install official Android Lollipop 5.0.2 on your Sony Xperia T2 Ultra
This tutorial is only for Sony Xperia T2 Ultra ( D5322, D5303, D5306, D5316, XM50h, XM50t ). Do no flash this on any other phone like Xperia T2 etc.
Disclaimer : I am not responsible if you brick your phone or if u make any other damage to your phone
Step 1:
- Download Flashtool from the official website - http://www.flashtool.net/downloads.php
- Install it on your PC using onscreen instructions. It will create a folder "Flashtool" in your drive (C:Flashtool)
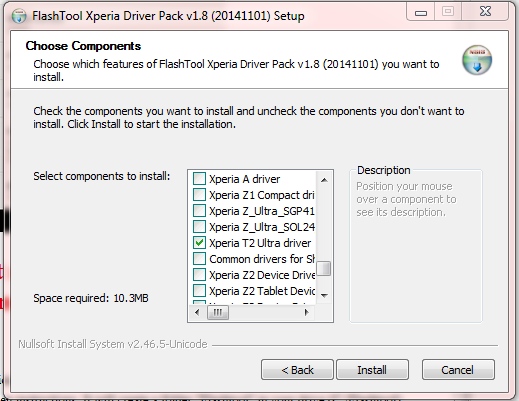
- Now go to CFlastooldriversflastool-drivers.exe and click on it and install it after marking/checking "Flashmode drivers and Xperia T2 Ultra Driver"
- Restart your PC
Step 2 :
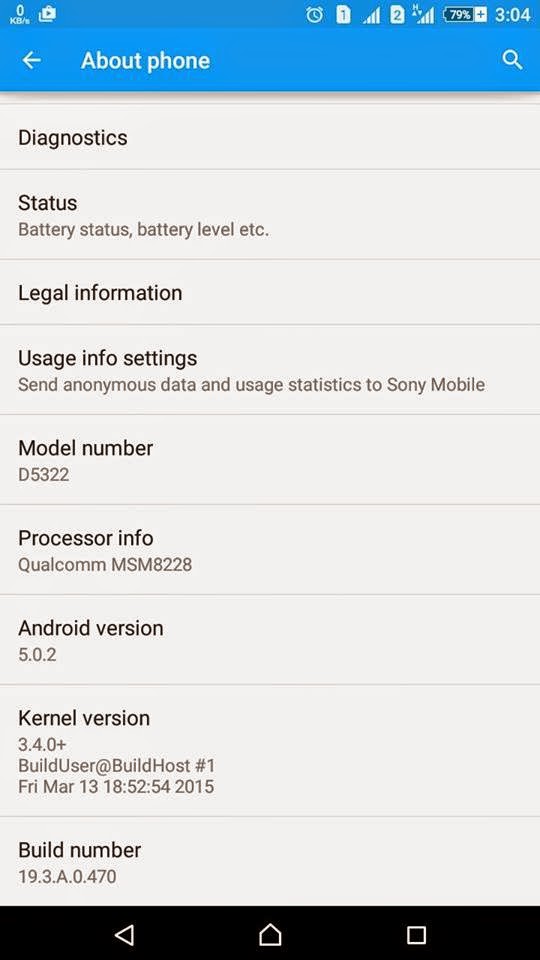
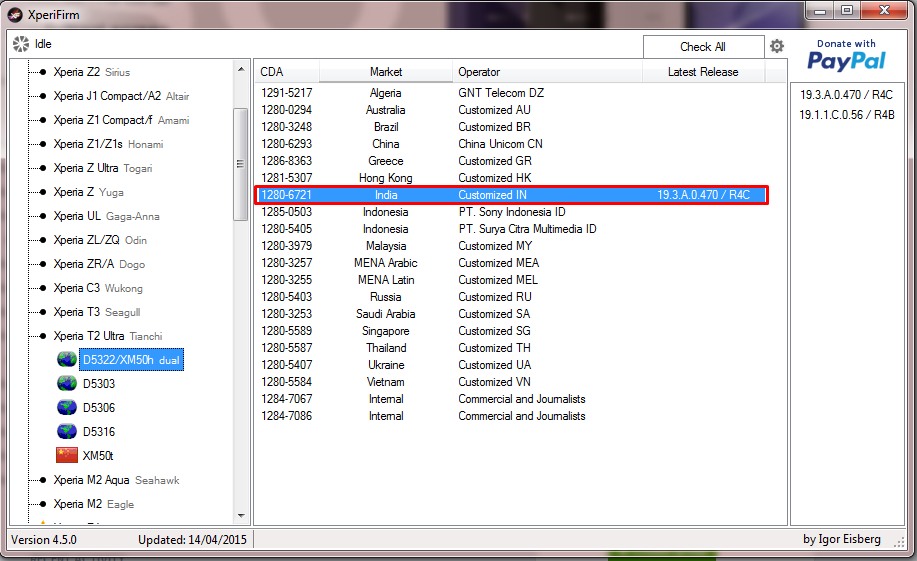
- Create your own FTF file using XperiFirm for your respective model ( Goto Settings> About to check your exact model number ). Here is the tutorial - http://www.waledacdroid.com/2015/04/how-to-download-sony-xperia-mobile.html.
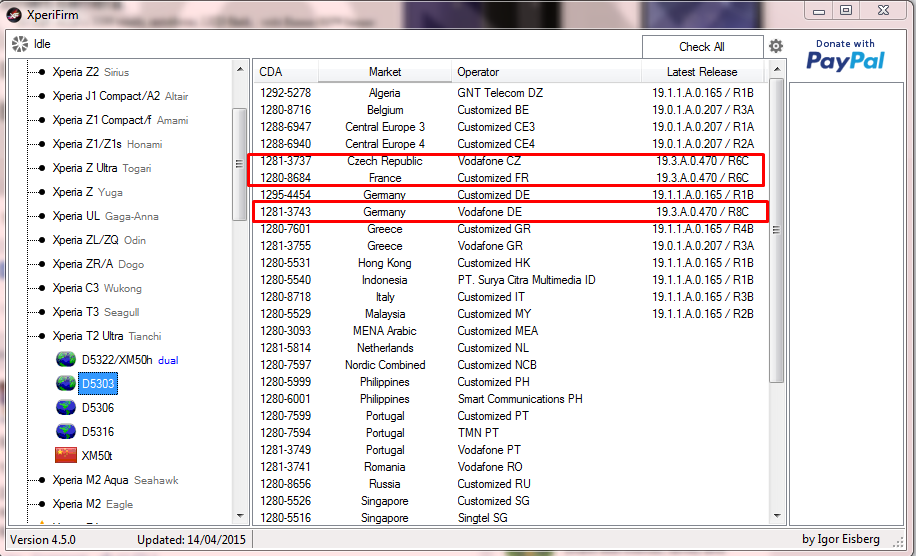
- Download the firmware for your exact model , currently Android Lollipop 5.0.2 is available only on D5322, XM50h and D5303. The Build Number 19.3.A.0.470 is the one you want to download. See the screenshots below. ( You can download the files of any region just make sure the model number is same )
Step 3 : Now place the created ftf file ( from Step 2 ) to C:UsersxxUSERxx.flashToolfirmwares ( where xxUSERxx is your windows username )
Step 4 : Now open Flashtool from the Start Menu
Step 5 : Now click on the FLASH icon of the flashtool which is on the left side of the iconic tab(below the file option-its like a lightning sign).a window will be opened Mode Selector. Check "FlashMode" and press "ok" button.
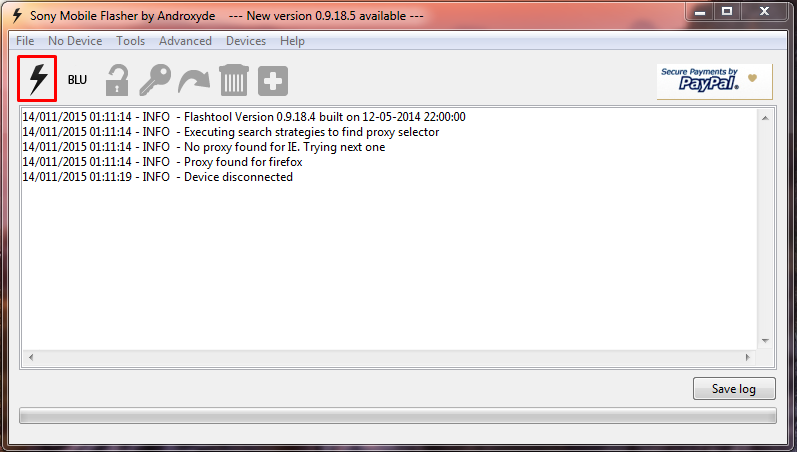
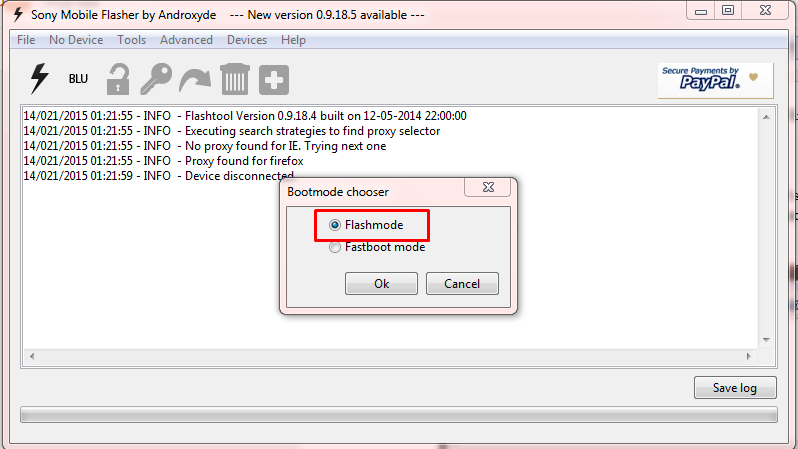
Step 6 : Now Select the Firmware file which you had placed in C:UsersxxUSERxx.flashToolfirmwares in Step 3
Step 7 : Now Click on the Flash Button
Step 8 : Now the flashtool will prepare files for flashing and then you will be prompted to connect phone in flashmode.
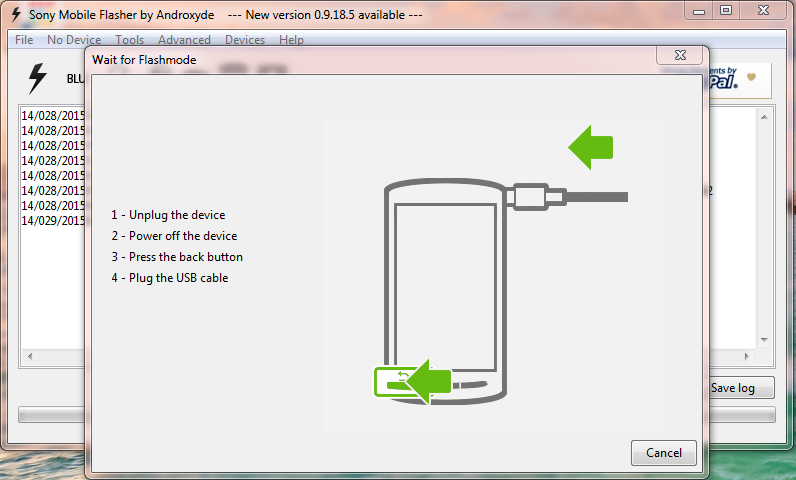
Step 9 :
- Now Power Off your phone and wait for 5 Seconds, then Connect your phone to PC using USB cable while pressing volume down button (-) (Make sure you dont release Volume down button until flashtool starts flashing)
- Flashtool will start flashing firmware it may take some time. ( Now u can release the volume down button )
- After flashing flashtool will prompt you to disconnect you phone. Discconet it and power on your phone (It may take some time for the first boot).
- Enjoy the Official Lollipop Android 5.0.2 on your Xperia T2 Ultra
Feel Free to Comment if you have any doubts ;)
Available link for download

Kingo Android ROOT
Kingo Android ROOT
What’s good in rooting with Kingo Android ROOT?
Faster performance
Preserve battery life
Access root-only apps
Remove carrier bloatware
Customizable appearance
Attain admin level permission
Devices


Kingo Android Root - CNET Download.com


Faster performance
Preserve battery life
Access root-only apps
Remove carrier bloatware
Customizable appearance
Attain admin level permission
Devices
Kingo Android Root - CNET Download.com
__________________
Wbr
GSMWorld
Wbr
GSMWorld
Available link for download
Firmware Mito 278
Firmware Mito 278
Firmware Mito 278

File info : 10A_GEMINIPLUS64_PCB01_GPRS_MT6252_S01.T219_EGL_L35_BT6612_JAVA_QC_V152.BIN
CPU type : Mediatek 6252
Read by : MCN BOX
Password : http://alumnialpha2000.blogspot.com
DOWNLOAD HERE
Klik Thanks bila artikel ini bermanfaat untuk anda.
Never Too Late To Learn.
Wassalam.
Never Too Late To Learn.
Wassalam.
Available link for download
Sony Xperia GO ST27a Jelly Bean 4 1 2 Tested Firmware
Sony Xperia GO ST27a Jelly Bean 4 1 2 Tested Firmware
You can use the firmware for flash or reset screen lock 100% tested.
Mobile : Xperia GO
Model : ST27a
System Version : Jelly Bean 4.1.2
Baseband : 6.2.A.1.100 Thai

Mobile : Xperia GO
Model : ST27a
System Version : Jelly Bean 4.1.2
Baseband : 6.2.A.1.100 Thai
download link:
Xperia GO ST27a 6.2.A.1.100 Thai --www.SamSony.net--.ftf - 606.96 MB
flash tool:
https://mega.nz/#!z4sSTaQZ!BVO7GSmoTrTwuuJAhadVCO6LQqLXMF543teobwpDG-I
download mode (power off device volume down+plug usb)
Available link for download
Radios modems carried the Nexus for Galaxy S GT I9000
Radios modems carried the Nexus for Galaxy S GT I9000
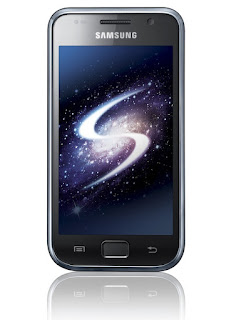
Radios (modems) carried the Nexus for Galaxy S GT-I9000 - Radios or modems, are responsible for controlling and managing all of our terminal that has to do with connectivity in general and is responsible for managing mobile coverage, data coverage, wifi and bluethoot.
Sometimes, changing Rom or firmware on our device, either by a bad flash or simply because we have not followed the installation instructions well, often happens that regard to communications from our terminal, we begin to fail and show malfunction, or just stop working.
In most cases this is achieved simply by accessing the Recovery and installing a new radio or modem compatible with our device, in more severe cases, the remedy would be to re-flash the selected Rom again, but this time from a clean installation from a base Stock.
As we have repeated more than once, each terminal, even though identical models are completely different, and that one works really well, for another it may not be the most suitable combination, this is usually because when change of Rom, we do based on other Rom property and do a clean install from the Recovery formatting all, we are remains of the ancient Roms that can make our terminal does not operate properly, so it is always advisable to do clean facilities, as this we will avoid many problems and headaches.
From here, when we introduced a new Rom, always attach the installation instructions of their creators, but as I said before, it depends on the work that we come to our own terminal to function better or worse.
With the following tutorial we can change the original radio that comes with a Rom on the advice of its own author of the work, to test how it goes in conjunction with our terminal specifically, or to solve possible problems and failures as a result of a bad flash .
Radios that today we are going to make, come directly from the Nexus and are optimized to cover up for our Samsung Galaxy S, and more specific, for the last basic Firmware 4.0 or Ice Cream Sandwich.
Download Nexus Radio KB3 cover
Download Nexus Radio KF1 cover (highly recommended)
The KF1 is the latest Nexus Radio and is giving better results, so it is particularly recommend you.
It may be that, as we have said before, when you install one of these new radios, your terminal does not end her working correctly, so also we are going to facilitate the zip of the original JVU radio to our Galaxy S, for installed in the same way through the recovery, so if you notarais lack of coverage or problems in general with your device connectivity to easily re-install this radio specific to our Galaxy S.
Download Radio JVU Galaxy S
Installation Method
- After downloading the files, copy them without decompressing to the root of our internal SD
- completely turned our device.
- Reboot into Recovery using the combo of the three buttons, remember, Volume Up + Home + Power.
- We went down to the Advanced option and within select Wipe Dalvik Cache and confirm.
- We went down to the Go Back option to return to the main screen of the Recovery and select Install Zip from SD Card
- Choose zip from SD Card and navigate to select the chosen radio and confirm installation.After installing the Radio, if we are not just restart the device, return to the main screen of the Recovery and reiniciaríamos selecting Reboot System Now option.
With this we have installed correctly the selected radio, so now you just have to try conscientiously to ensure that everything works properly, if it were not so, repeat the process to install another radio.
Available link for download
TeamViewer 7 0 14563
TeamViewer 7 0 14563

TeamViewer is the All-In-One Solution for Remote Access and Support over the Internet.
TeamViewer connects to any PC or server around the world within a few seconds. You can remote control your partners PC as if you were sitting right in front of it.
Features:
TeamViewer connects to any PC or server around the world within a few seconds. You can remote control your partners PC as if you were sitting right in front of it.
Features:
- control computers remotely via the internet,
- record your session and covert it to AVI,
- online meetings,
- Drag & Drop files,
- Multi-Monitor support.
DOWNLOAD HERE
Klik Thanks bila artikel ini bermanfaat untuk anda.
Never Too Late To Learn.
Wassalam.
Never Too Late To Learn.
Wassalam.
Available link for download

Subscribe to:
Posts (Atom)